Lesson 1 — Know the Alarm
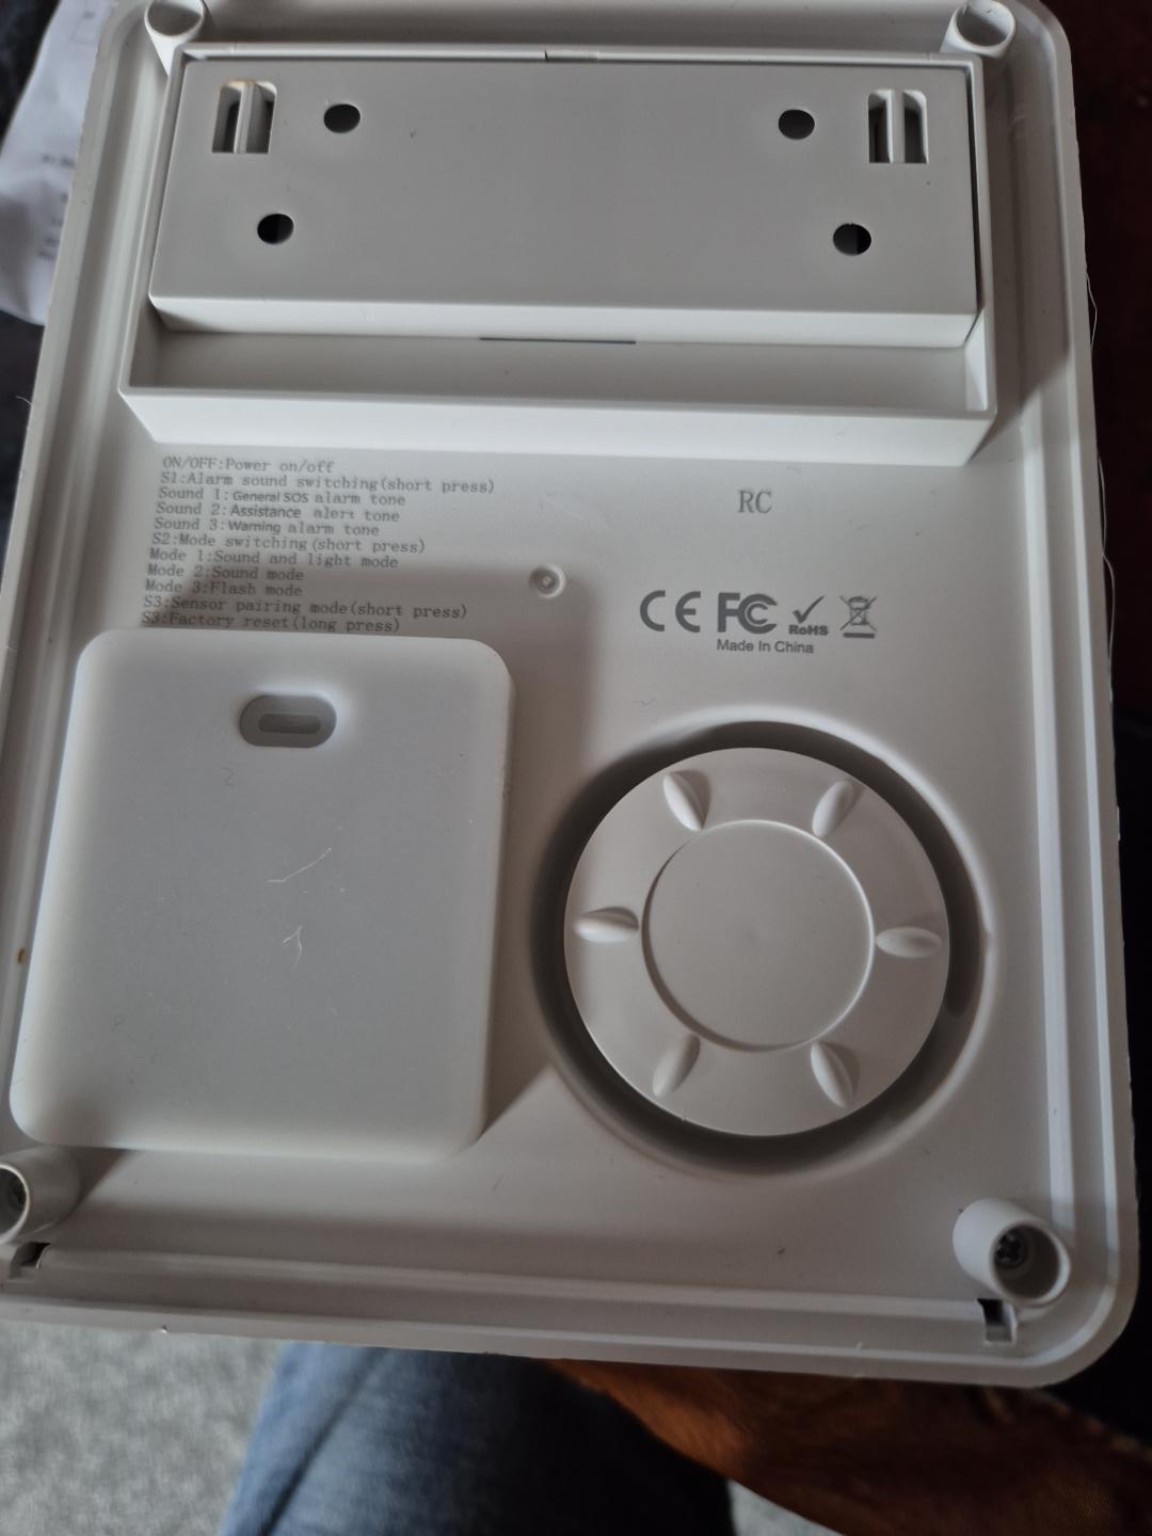
This is a self-contained solar-powered wireless alarm with an internal rechargeable battery, siren, indicator, radio receiver and removable mounting bracket.
Main parts
- Solar charging panel
- Siren / buzzer
- Indicator light
- ON/OFF battery switch
- S1 alarm-sound button
- S2 working-mode button
- S3 accessory pairing/reset button
- USB 5V charging input
- Mounting bracket
Lesson 2 — Charge and Power Up
- Before first setup, give the alarm a full charge.
- For USB charging use a regulated DC 5V / 1A supply. The supplied instructions give about 4–5 hours for USB charging.
- Solar charging depends on sunlight and may take more than 10 hours. Choose a site with strong direct sun.
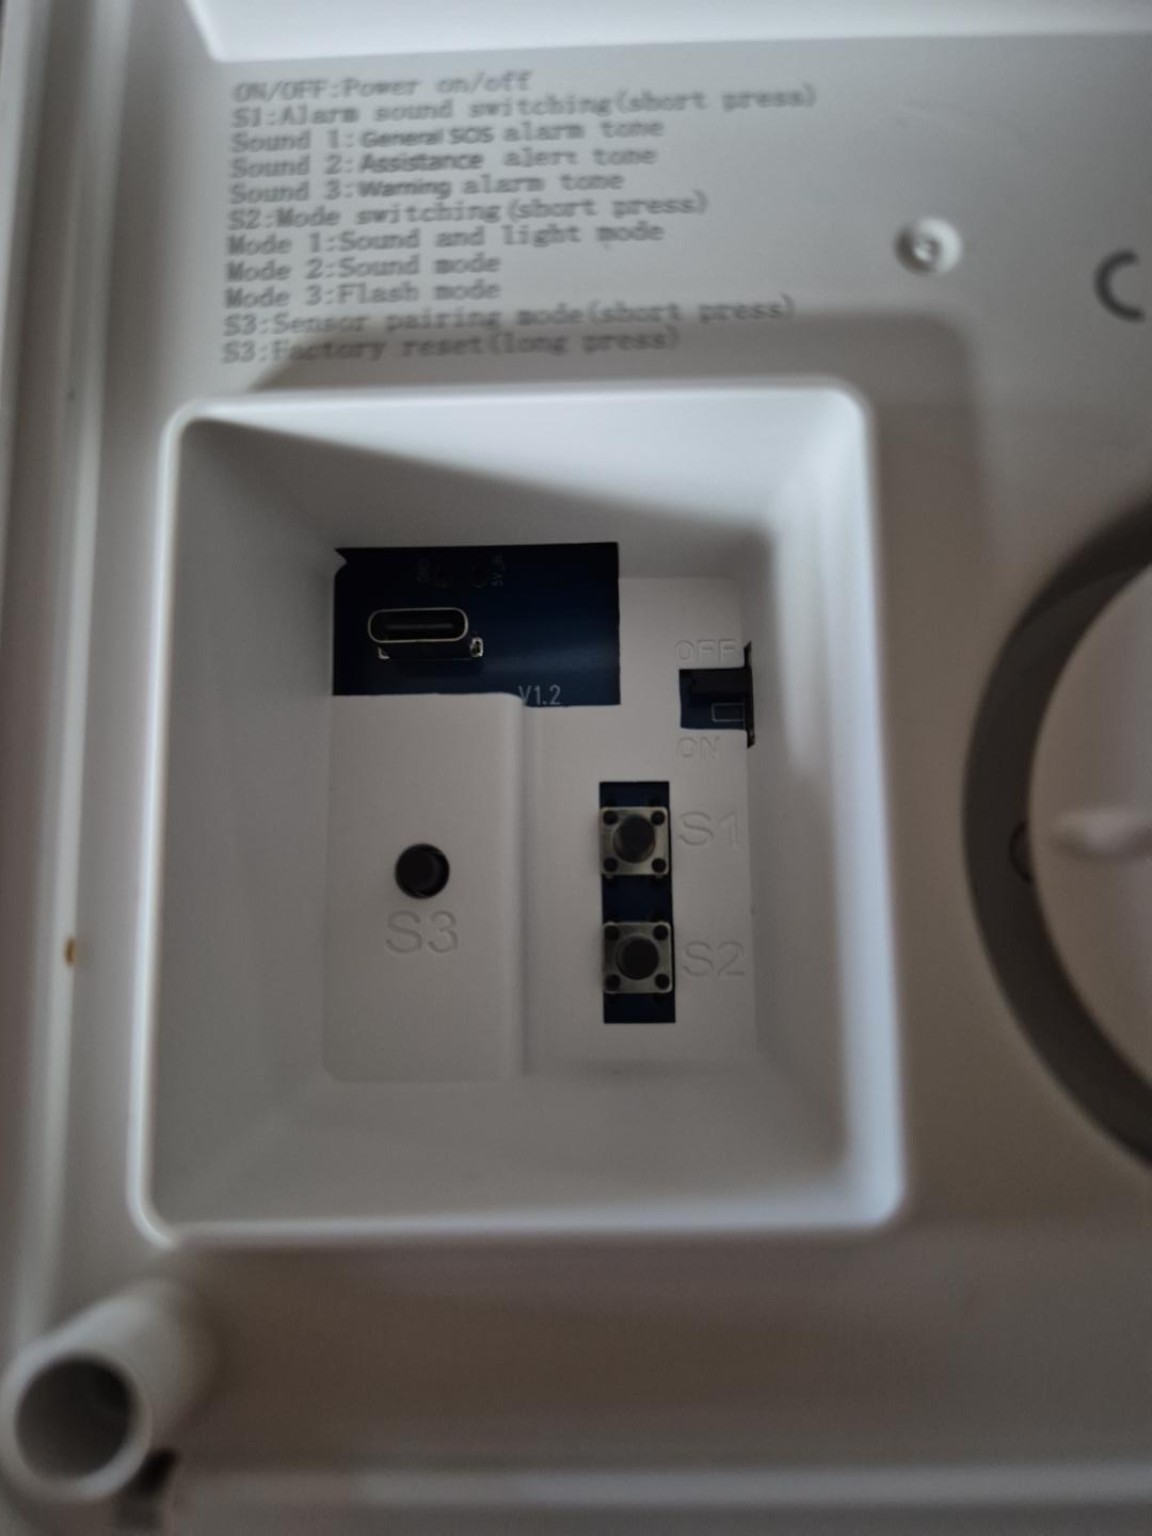
- Open the rear control cover and move the battery switch to ON.
- On normal startup the supplied manual describes two buzzer sounds and two indicator flashes.
Lesson 3 — S1, S2 and S3 Controls
| Control | Job |
|---|---|
| S1 — short press | Cycles the alarm sound/voice. |
| S2 — short press | Cycles the working mode. |
| S3 — short press | Enters wireless accessory pairing mode. |
| S3 — long press | Factory reset / delete stored accessories. |
S2 modes in the supplied manual
- Sound + light mode — one indication
- Sound mode — two indications
- Flash mode — three indications
Lesson 4 — Pair the Remote Controls
- Turn the alarm ON.
- Short press S3 once. The alarm enters accessory configuration mode and the indicator should flash continuously.
- Within about 20 seconds, press a button on the first remote so it transmits.
- A successful configuration is confirmed by the alarm's confirmation indication.
- Repeat the procedure for the second remote. Pair each accessory separately.
- Move away from the alarm and test both remotes again.
Lesson 5 — Pair Sensors and the SOS Button
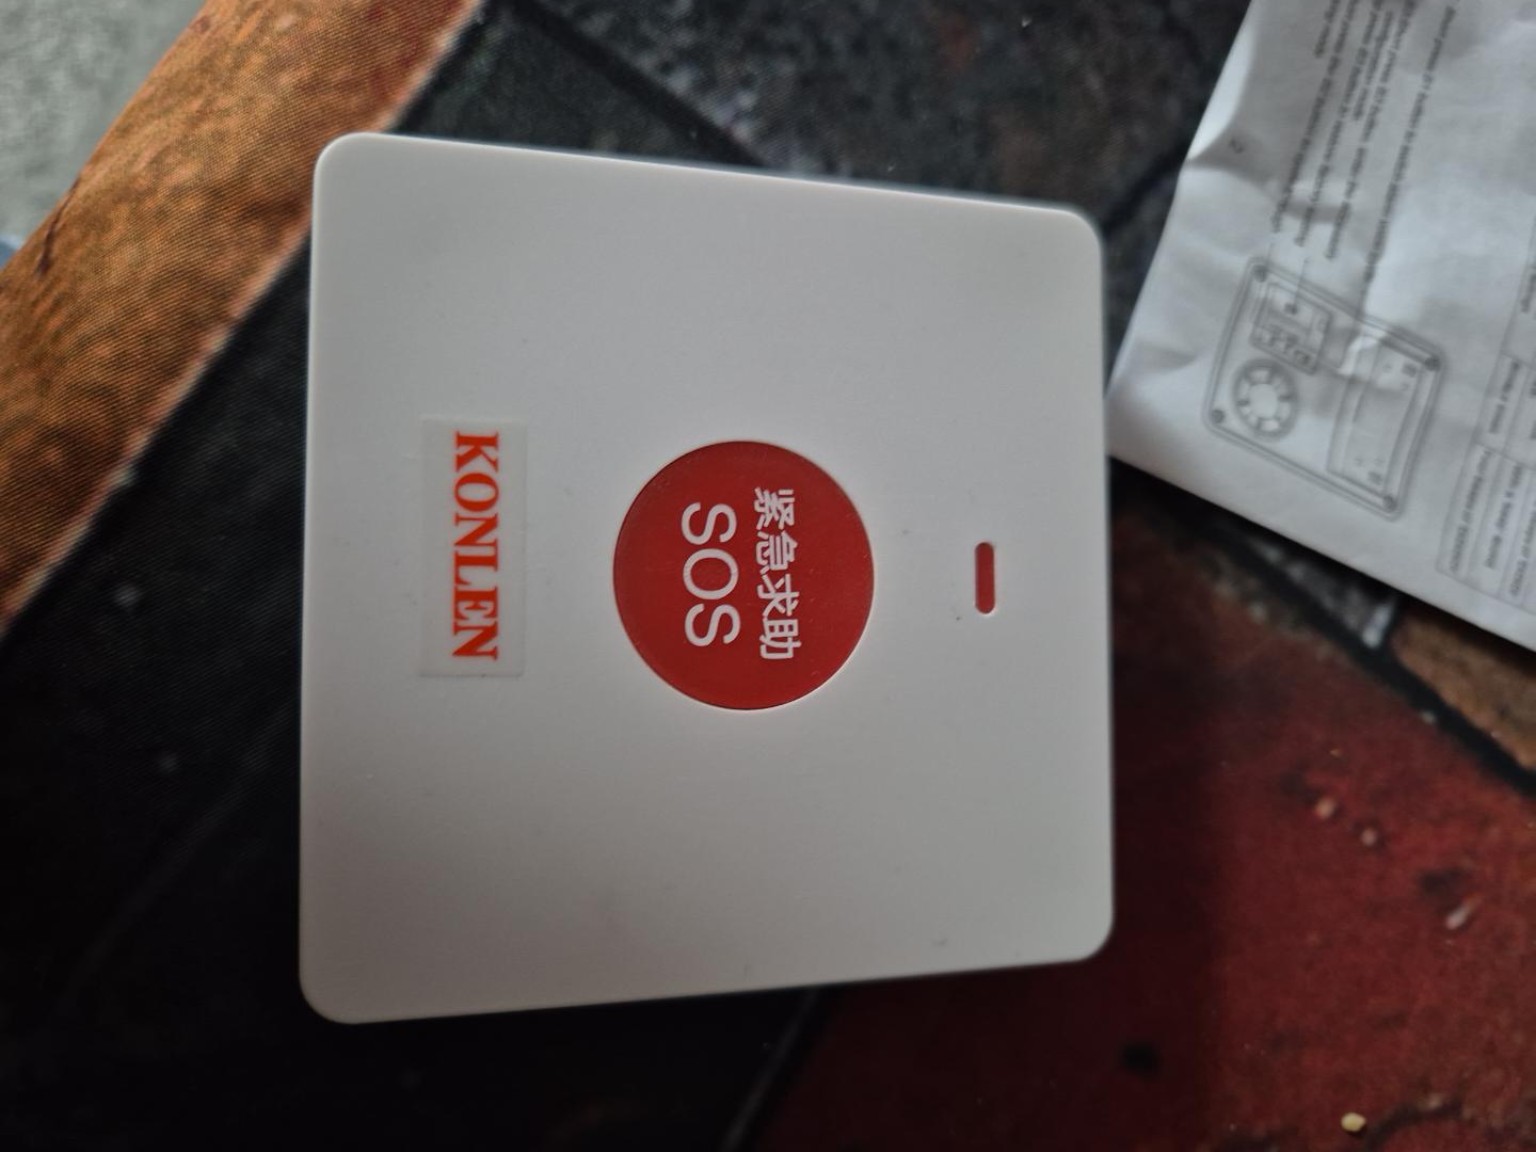
The same S3 pairing procedure is used for compatible wireless accessories such as detectors and panic/SOS transmitters.
- Short press S3 to enter pairing.
- Trigger the detector, door contact, remote or SOS transmitter so it sends its radio code.
- Wait for the confirmation before pairing the next accessory.
- The supplied manual indicates support for up to about 10 accessories.
If pairing fails
- Recharge the alarm.
- Bring the accessory close to the alarm.
- Make sure you used a short S3 press.
- Trigger the accessory while the alarm is still in pairing mode.
- If necessary, reset and start again — but remember a reset deletes stored accessories.
Lesson 6 — Arm, Disarm and Emergency Operation
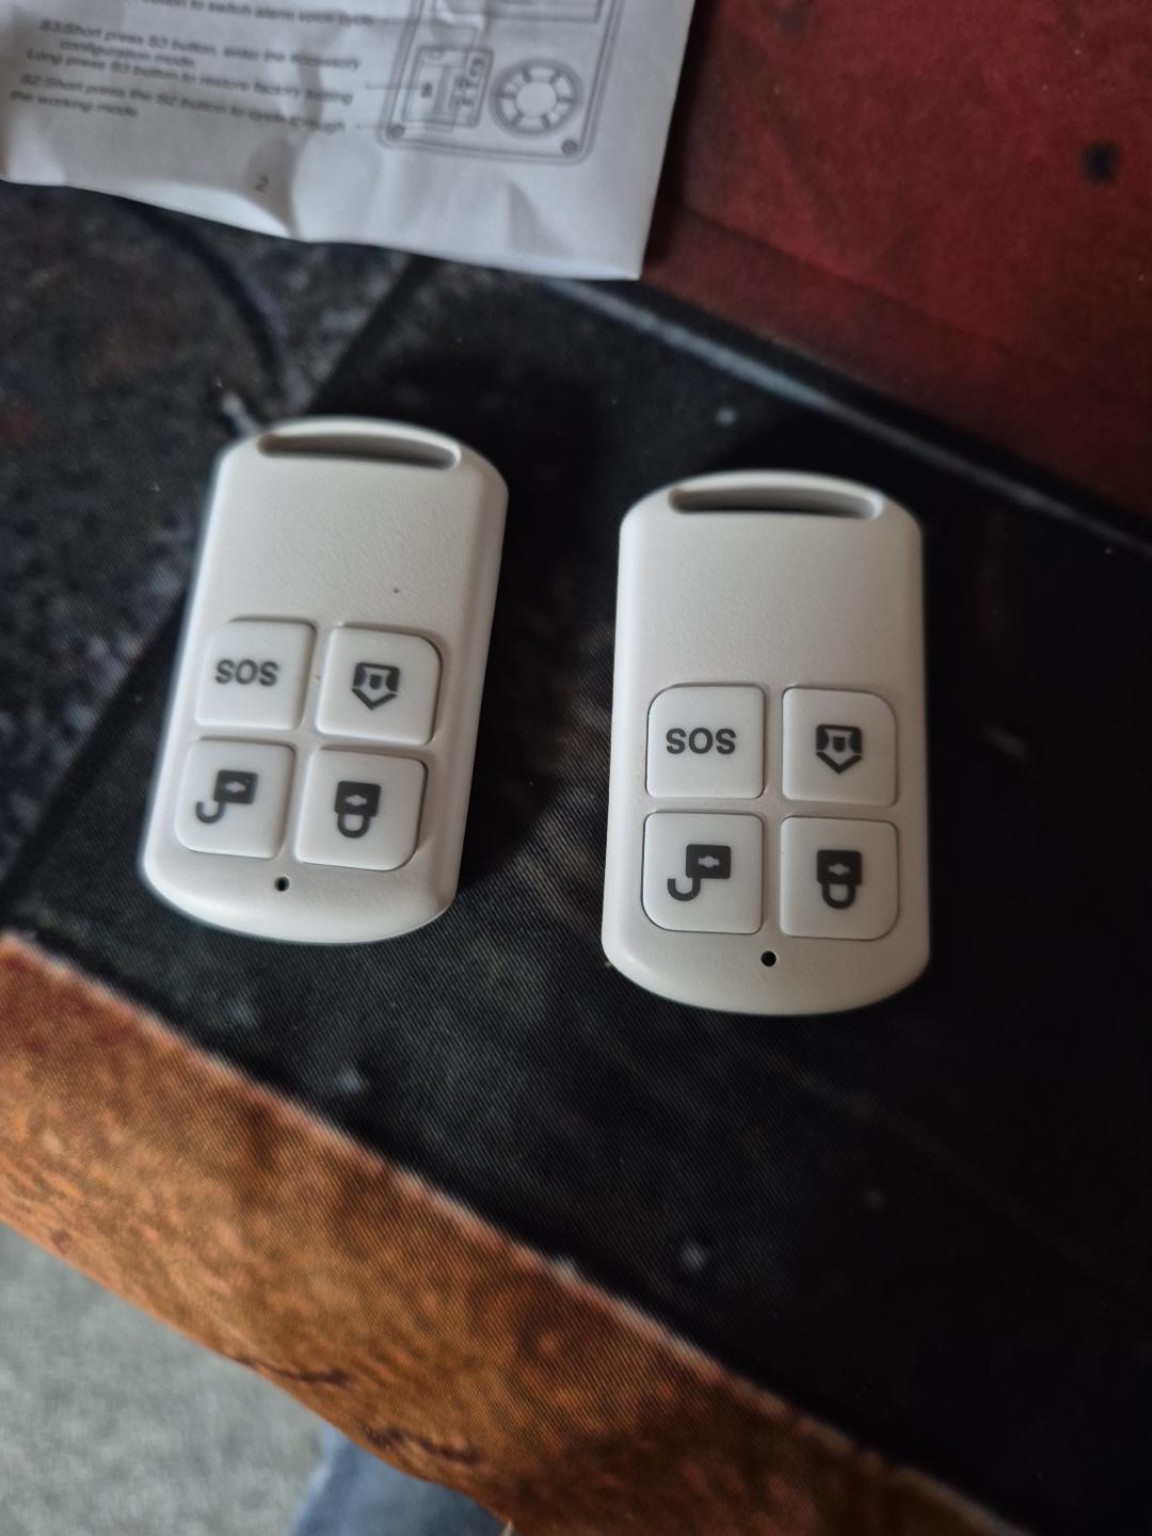
| Remote control | What it does | Test |
|---|---|---|
| Closed padlock | ARM — places the system in its alert state. | Arm, then trigger a paired detector. |
| Open padlock | DISARM — returns normal zones to a non-alert state and can stop an alarm. | Disarm and verify a normal detector no longer alarms. |
| SOS | Immediately requests an emergency/local alarm. | Warn anyone nearby before testing — the siren is loud. |
| House/home symbol | Auxiliary/home function on compatible variants. | Confirm behaviour on this exact unit before relying on it. |
Lesson 7 — Factory Reset
Use this only when you intentionally want to clear the stored accessory list or recover from a confused setup.
- Turn the alarm ON.
- Press and hold S3.
- The supplied manual describes four buzzer sounds and four indicator flashes for deletion/reset.
- Release S3.
- Pair both remotes and all sensors again from the beginning.
- Perform a complete functional test.
Lesson 8 — Installation and Commissioning
- Before drilling anything, test wireless range at the intended alarm and sensor locations.
- Choose a location with good direct sunlight. The original instructions recommend at least about five hours of direct sun.
- Avoid large metal objects, reinforced concrete and strong sources of radio interference.
- Fix the bracket securely using screws and wall plugs suitable for the surface.
- Align the alarm with the bracket clips and slide/pull it down until secure.
- Perform the final arm, detector, disarm and SOS tests from the normal operating positions.
Commissioning checklist
Lesson 9 — Troubleshooting
| Problem | What to do |
|---|---|
| No power | Charge using 5V/1A USB and check the ON/OFF switch. |
| Remote does nothing | Move closer, re-pair it, then increase the test distance. |
| Sensor will not pair | Short press S3 and trigger the sensor promptly while configuration mode is active. |
| Pairing repeatedly fails | Recharge; pair one accessory at a time; reset only if necessary. |
| False alarms | Check detector position, moving vegetation/animals, heat sources and interference. |
| Battery runs down | Improve sunlight, clean the panel and top up using 5V/1A USB. |
Lesson 10 — Technical Reference
| Item | Supplied documentation |
|---|---|
| Power | Solar charging / DC 5V |
| USB charge | 5V/1A, approx. 4–5 hours |
| Battery | 3.7V 1000mAh lithium-polymer |
| Wireless | 433.92 MHz, 1527 protocol |
| Open-area receive distance | Approx. 100m or more; real range depends on obstructions/interference |
| Temperature | Approx. -20°C to 55°C |
| Humidity | 40–80%, non-condensing |
| Size | Approx. 164.3 × 124.3 × 59 mm |
Final Knowledge Check
1. Which button enters accessory pairing mode?
2. What USB supply is specified?
3. What can a long press of S3 do?
4. When should you mount the alarm permanently?
5. Does SOS automatically call emergency services?
Course Complete
If you have completed the lessons and the commissioning checklist, you should now be able to charge, configure, pair, test, reset and install this solar wireless alarm.